Temponia for Jira
Set up time tracking on your Jira issues
Track time without leaving Jira. Every entry lands in Temponia for reports, approvals and invoicing, and is written back to the issue as a regular Jira worklog.
Before you start
- A Jira Cloud site where you can install apps (you are a Jira administrator).
- A Temponia workspace. You can start a free trial at temponia.com.
- At least one project in Temponia to receive the time. Create it in your Temponia portal under Getting started, then Create project.
Install the app
Jira admin- Open the Temponia listing on the Atlassian Marketplace and select Get it now.
- Choose the Jira site to install onto and confirm.
The app is free on the Marketplace. Temponia itself is priced on the people who track time, not on the size of your Jira site.
Open the Temponia panel on an issue
EveryoneThe panel does not appear on its own. You add it to an issue once, and Jira remembers it from then on:
- Open any Jira issue.
- Click the Apps button (the hexagon icon) directly under the issue title, next to the + button.
- Pick Temponia from the menu.
Can't see it? Searching the page for "Temponia" finds nothing while the panel is closed, because the entry sits behind the Apps button. On some issue views it appears inside the + menu instead, under Apps. And the green "Connected" badge under Site settings > Connected apps is Atlassian's own app wiring. The Temponia connection happens inside the panel, in the next step.
Connect your workspace
Temponia owner or adminDone once per Jira site.
- In the panel, enter your Temponia workspace name. That is the first part of your Temponia address: for
yourcompany.temponia.com, enteryourcompany. - Select Connect Temponia. The panel produces a single-use link.
- Open the link and confirm while signed in to Temponia as an owner or admin.
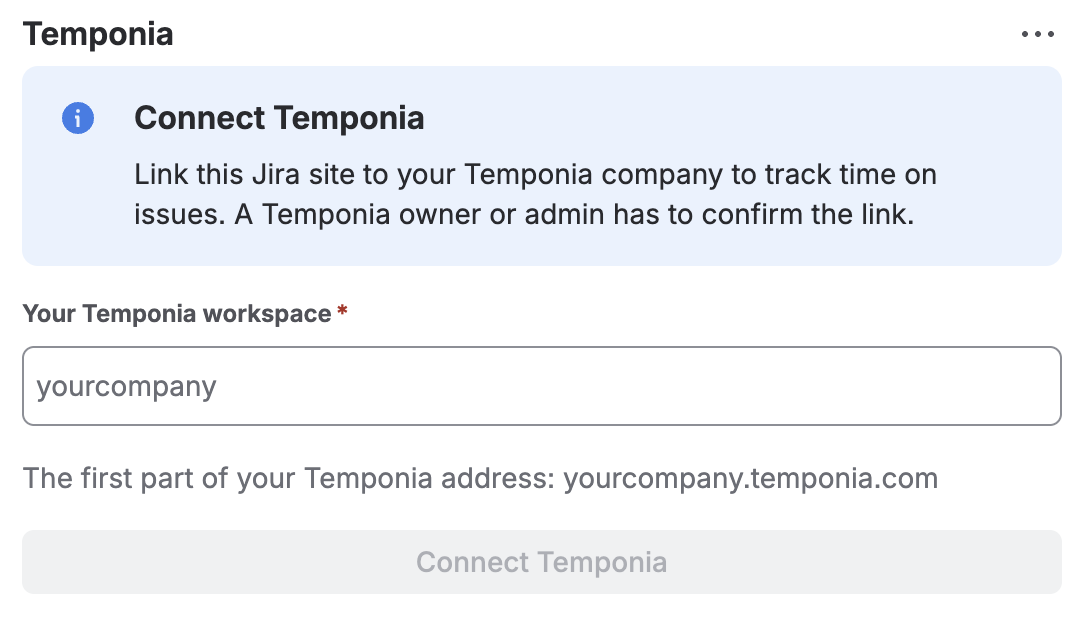
Why two steps? Connecting is deliberately double confirmed: someone with rights in Jira starts it, and someone with rights in Temponia completes it. The link expires after 10 minutes and can only be used once.
Map your Jira project
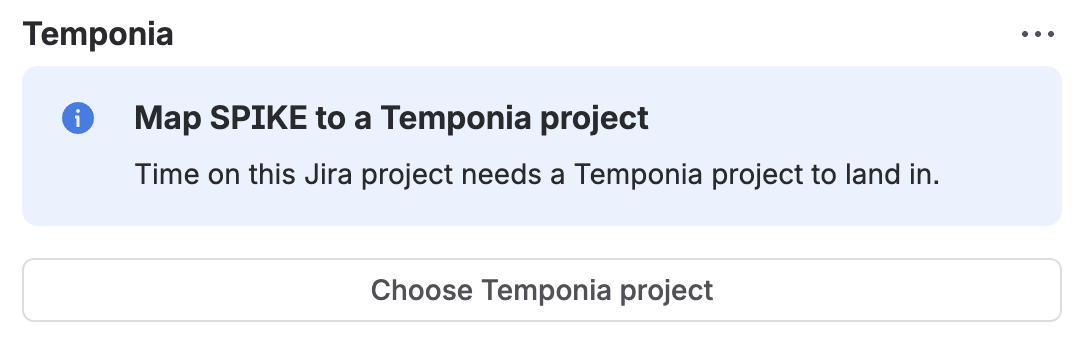
Temponia owner or adminTime tracked on a Jira issue has to land somewhere in Temponia, so each Jira project points at one Temponia project.
- Open an issue in the Jira project you want to map.
- Select Choose Temponia project in the panel.
- Pick the Temponia project and save.
Link your account
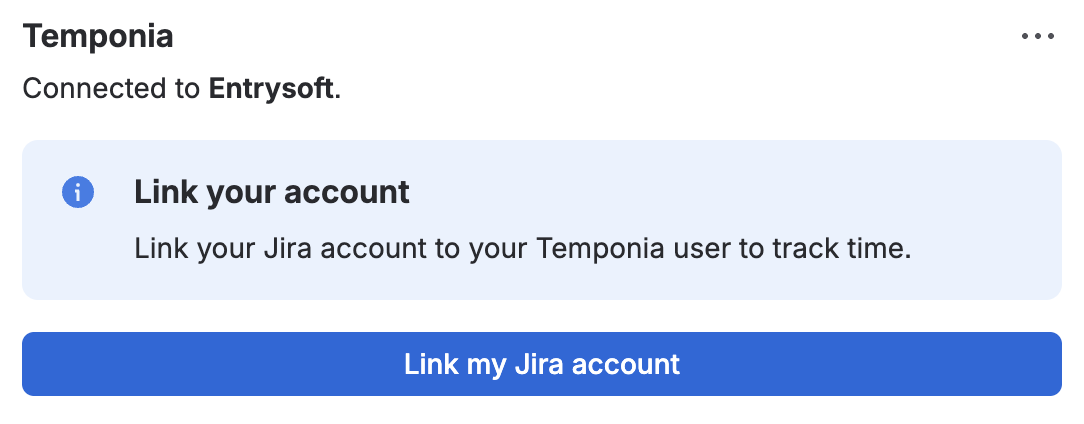
Everyone, onceEvery person does this once, for themselves. It is what lets the app write worklogs under your own name instead of a generic integration user.
- Open any issue. The panel offers Link my Jira account.
- Confirm in Temponia while signed in as yourself.
Track time
EveryonePick a Task (the list comes from the mapped Temponia project), add an optional note, and either run a timer or log the time manually.
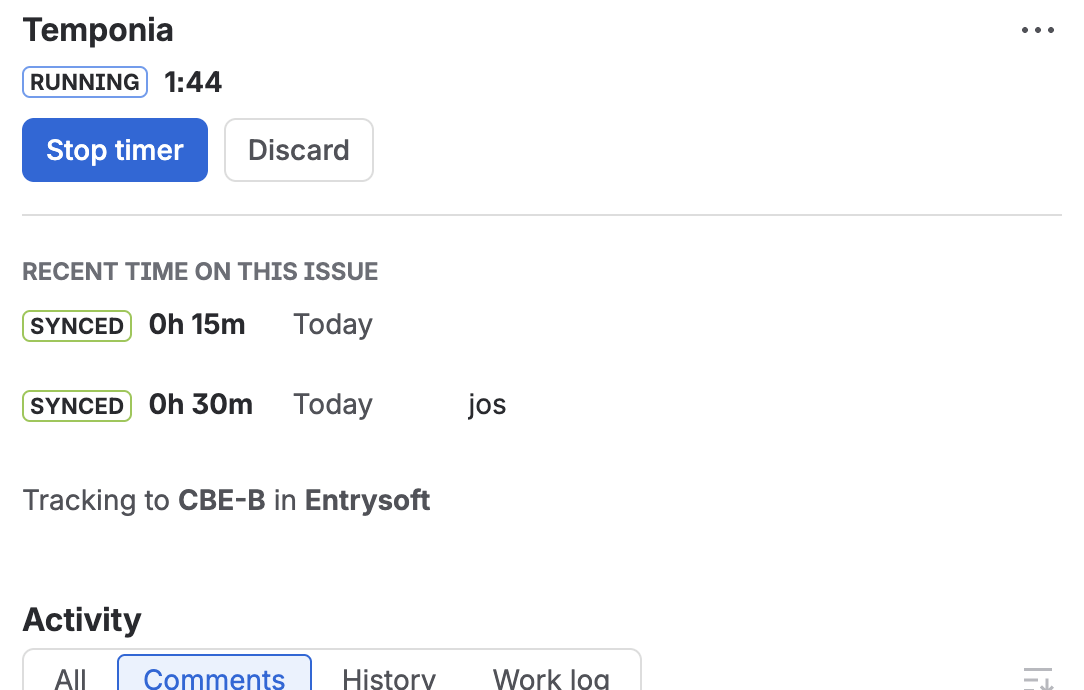
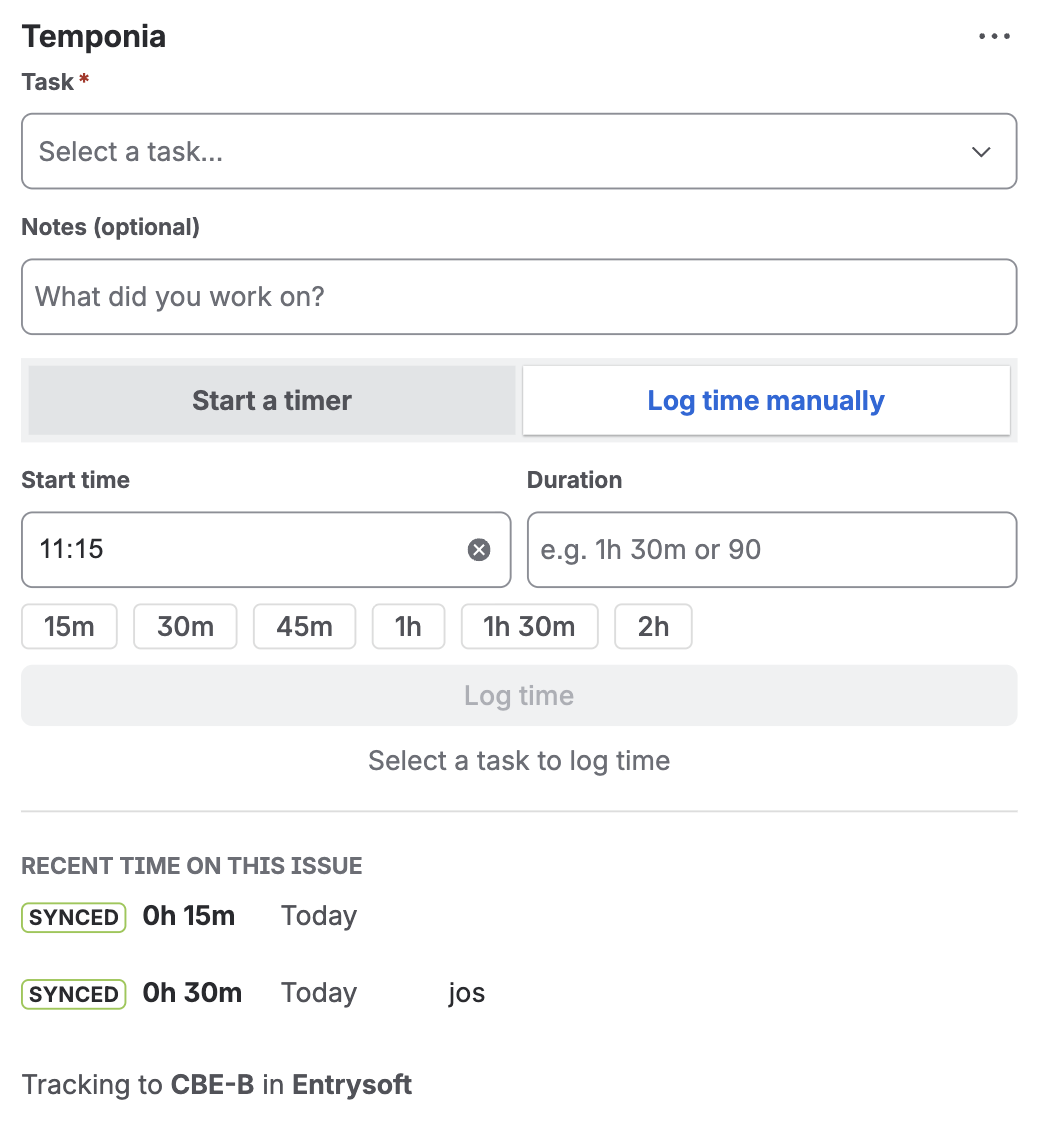
Each entry appears under Recent time on this issue with a SYNCED chip once the worklog is on the issue.
Rounding. Durations follow your company's rounding rules in Temponia. If your company rounds to 15 minutes, a timer stopped after six minutes rounds down to zero and no entry is created. That is the rounding setting doing its job, not a failed sync.
Where your hours show up
Open your Temponia portal at yourcompany.temponia.com and go to
Reports for totals per month, per project, per task and per
person, with exports. Approvals and invoicing work on the same entries.
On the Jira side, every entry is also written to the issue's Work log tab as a regular worklog, authored by you, so Jira's own Time tracking field keeps working exactly as before.
One direction to watch. Time logged with Jira's built-in Log work button is separate from Temponia and is not imported. To see hours in your Temponia reports, log them through the Temponia panel.
Troubleshooting
- I can't find the Temponia panel
- It is behind the Apps button (the hexagon icon) directly under the issue title. See step 2. This works on all Jira plans, including Free.
- I stopped a timer and no entry appeared
- Almost always rounding. Check your company's rounding setting in Temponia.
- The task list is empty
- The Jira project is not mapped yet, or the mapped Temponia project has no tasks. See step 4.
- The entry is in Temponia but the worklog is not on the issue
- Reload the issue first; Jira's Time tracking field does not always refresh on its own. If it is still missing, open the health view on the integrations page in Temponia and retry the queued write.